Showing posts with label gifts. Show all posts

Tuesday, February 26, 2013

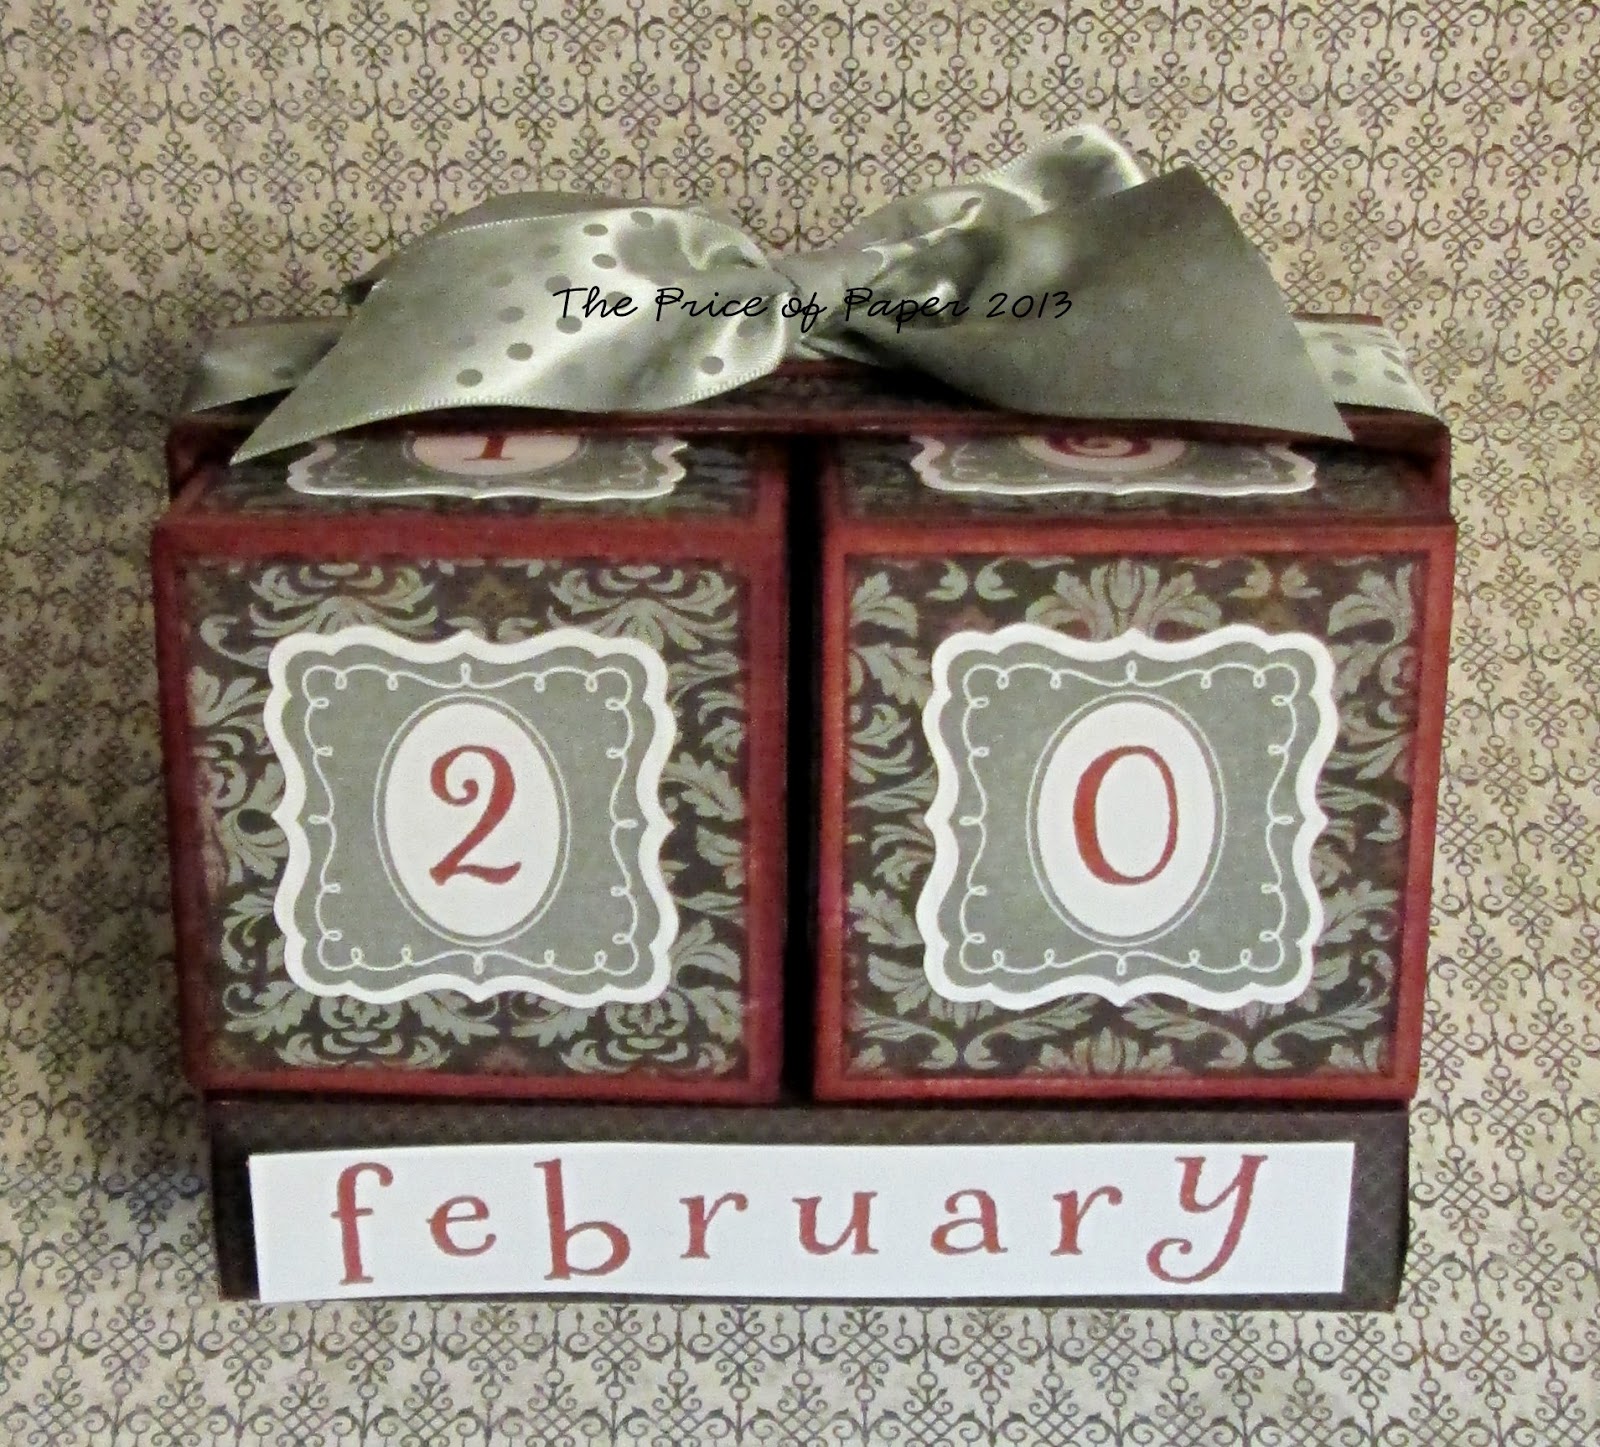
Perpetual Calendar Workshop

This perpetual calendar makes a great gift for birthdays, Mother's Day, teachers, or for yourself!


To create one Perpetual Calendar you will get:
1 My Creations Card Box
2 My Creations Cubes
3 1/2 sheets B&T paper and/or cardstock (I will have three different paper options for you to choose from)
42" ribbon
pre-cut Cricut shapes
Hook & Loop Dots

Cost: $22

You will be allowed to use my stamps and blocks, inks, re-inkers, sponges, and Liquid Glass.

What you will need to bring:
Paper trimmer
Scissors

This workshop will take place on Saturday, March 16th at 1:00 p.m. Please RSVP with payment by Sunday, March 10th.

Sunday, December 18, 2011

Rock the Block Hop


Welcome to the Rock the Block Blog Hop! 


This fun hop features the fabulous Rock the Block promotion that runs from December 19, 2011 through January 31, 2012. It includes an exclusive E-size stamp set, as well as the My Creations Collage Cubes that can be yours for just $15 with qualifying purchase*. If you have come here from Angel's blog, you are on the right path. The Blog Hop is a great big circle so you can start here and work your way around. If you get lost along the way, you’ll find a complete list of participating consultants here.

There are over 25 Close To My Heart Consultants sharing their creations using the Rock the Block stamp set and the Collage Cubes. Hopping is simple to do - just click on the link at the end of the post on each blog to move to the next one. Here we go!


I am crazy about the Sonoma papers because I love purple! I'm also crazy about my son and the photos I had taken of him over the summer, so I decided to use them for this project. This is the top:
Side 2:
Side 3:
Side 4:
Tray inside:
Side view:


Supply List:
X7143B Sonoma Level 2 paper packet
Rock the Block stamp set
My Creations Collage Cubes
1388 Colonial White Cardstock
Z2137 Olive Exclusives Inks stamp pad
Z2141 Smokey Plum Exclusives Inks stamp pad
Z2114 Cocoa Exclusives Inks stamp pad
Z2118 Desert Sand Exclusives Inks stamp pad
Cricut® Close to My Heart Art Philosophy cartridge


Now "Hop" on over to Rachel's blog to see her work, and be sure to visit each consultant's blog to get some great crafting inspiration and other fun ideas! Remember, this amazing deal is only available until January 31st!


*Make a minimum purchase of $25 from the Autumn/Winter 2011 Idea Book and get the two NEW products for just $15: the My Creations® Collage Cubes (a Spring/Summer 2012 sneak-peek product!) and the exclusive My Acrylix® Rock the Block E-size stamp set. That’s a retail savings of almost $30! You're going to love the Collage Cubes and the Rock the Block stamp set, which work together for interactive, 3-D fun.

Teacher Gifts

As we all know, it's that time of year again. Time to figure out what you're going to give your children's teachers for Christmas. I just about always make monogrammed note cards. They're fairly fast, simple, and easy, and considering how many gifts teachers receive, they should also come in handy.
Once I found out that my son's teacher likes purple, I decided to make it even easier on myself by making the same monogrammed cards I'd made for myself with the My Creations Card Box and Sonoma papers. I made a few simple modifications (I used the zip-strip border instead of plain Olive cardstock, I added a little more color by leaving a border around the patterned paper, and I made the monogram the center of a flower rather than just layering it on a scalloped circle).
I also stamped the monogram on the envelope flap to make the set more complete.

While all of my son's teachers are important, I wanted to give gifts to his homeroom teacher, as well as his math and reading teachers. The note cards were for the homeroom teacher, but I wanted to make her something else that I could also give the others. I decided to go with using the Typeset papers to create a door hanger pouch that I could put Post-It Notes in.
I have made these before, but it was so much easier with the Cricut Art Philosophy cartridge and our new double-sided paper! I didn't have to take the time to cut paper to fit and glue it down, I just hit "cut" and my door hanger was ready to go! Even though Close to My Heart's new patterned papers are a heavier weight, I thought it would be wise to sturdy the back up a bit. I did this by cutting another door hanger from Juniper cardstock and cutting it off where it just covered the back. I also cut out the piece for the front of the pocket and put it on the inside of the pouch for a little support. The zip-strip was the perfect accent for the pouch edge, and with just a few embellishments I had a great gift!

Thursday, December 8, 2011

Maid Service

I received one of these magnets from my cousin many years ago, and I still get a kick out of it. It's such a cute and simple idea, and I have duplicated it several times to give as gifts to friends. I made a new batch to sell at a recent craft fair and managed to sell quite a few.


Here's how to make some of your own:

  • Magnetic sheets (I actually just recycled the magnets that come on the front of the phone book!)
  • Patterned paper
  • White or Colonial White cardstock
  • Buttons
  • Adhesive (i.e., Tombow, Xyron Sticker Maker, Glue Dots)

Using your favorite word processing or layout program, type up the text so that it fits inside a 2 1/4" x 2" rectangle. Print and then cut out the rectangles. Trim both the magnets and patterned paper to 2 3/4" x 2 1/4". Adhere the patterned paper to the magnet, and then the text piece on top of that. Use a Glue Dot to stick a button in the middle, and you're done!


The text reads: (top) Press Button for Maid Service
                  (bottom) If No One Answers Wait a Moment Then Do It Yourself!

Happy crafting!


Friday, November 25, 2011

Black Friday Sale!


Have you been good this year and gotten your name on the Nice list?

If so, have Santa* email me an order anytime Friday, November 25th through midnight Sunday, November 27th for the

Cricut® Art Philosophy Collection

(or any order totaling $99 or more**)

Santa* will receive a 10% discount off his order
plus free gift wrapping and delivery from my house to under your tree!

This offer is only available through Vicki Price, Close to My Heart Independent Consultant. Valid Friday, November 25th through midnight Sunday, November 27th. All orders must be paid in full no later than November 28th. Cash, check, and credit cards accepted. Not valid with online orders. *Santa can be a significant other, friend, relative, or even yourself. **$99 total before shipping and taxes.

Email me at priceofpaper@gmail.com to order!


Sunday, November 6, 2011

Card Box & Monogrammed Cards

One of my favorite pieces of artwork in the Fall/Winter Idea Book is the Christmas Cards box on page 120. I knew it was something I either wanted to copy or use for inspiration. I decided on the inspiration because I thought a card box would make a great gift and workshop project.
I also decided it was time I made something for myself, and since I'm crazy about the Sonoma papers, I chose to use them for the project. I decorated the box first because I knew it would take me longer than the cards would. The patterns in this set are so elegant that I added some of the Opaques to keep the embellishments as elegant as the papers.
Although I absolutely love the purple flowers, the crystal charm is my favorite accessory on the box. It's the perfect touch!
I purposely made the cards without too much fuss. Even though I made this set for myself, it's nice to have some cards that don't have bulky embellishments that can drive up the price of mailing them.

I couldn't decide which side of the paper I liked better, so I went with the best of both worlds - five of each!

Please feel free to contact me if you'd like cutting dimensions or a supply list so you can make this project for yourself!

Wednesday, November 2, 2011

My Sister's Birthday

My little sister had a birthday a couple weeks ago, but I didn't post what I'd made her at the time because I didn't want to take a chance that she'd see it online before she actually had it in her hot little hands.
I started with her card and the fact that she loves dragonflies. I couldn't resist using the adorable dragonfly on the Cricut Art Philosophy cartridge! I also thought the Roxie paper suited her taste. I ended up with extra dragonflies in trying to figure out the perfect size, so I decided to use one on the envelope too.

As for her gift, I was at a loss as to what to make this year when I realized that she needed a place to jot down the funny things my 3-year-old niece says. I decided to make her a homemade "smash it" book.
I love making these books myself because it's a fabulous way to use up paper I've been hoarding. My sister happens to like pink, as does my niece, so I found a bunch of different pink papers to use.
I made three pocket pages for clippings, ticket stubs, etc. I decided to make a few more dragonflies so that there's one on each pocket.
I included lined paper for memories and funnies.
The remaining pages are basically layouts where she can attach small photos, receipts, and anything else she wants to keep.

I was really happy with the results, and so was she! Happy birthday, Sister!
Monday, September 12, 2011

I am surprised and honored!

I was browsing my friend's blog earlier today and discovered that she'd given me a blog award! I didn't even know there was such a thing! Thank you so much, LeAnne Dudley!


This award recognizes the little bloggers out there with fewer than 200 followers. How fun to share the love and boost each other's followers. LeAnne has a terrific little blog too, so be sure to check it out!


Now I get to pass the award on to five of my favorite blogs with less than 200 followers. I hope to find a few more followers and help others at the same time. If you haven't already, click on the link to follow me, and then take a look at these other creative blogs and follow them as well.


I had a hard time choosing only five because there are so many great blogs out there! However, if you see your name/blog listed below, please pass on the award so we can keep boosting each other's followers:


Make and Take Time


Isom Cre8tions


Stamped & Papered


Stampin' Buds


Clearly Stamping


Now, if you visit each blog and follow the ones you like, the numbers will increase dramatically and you will have made numerous new friends and contacts!


Washer Necklaces


My very talented downline LeAnne discovered washer necklaces last year, and after she made a bunch of them, she posted a tutorial on her blog. Click here to see how to make these gorgeous necklaces yourself. They're the perfect project to use up some scrap on, and they make a great gift!


(Many thanks to LeAnne Dudley for allowing me to link to her tutorial.) 


Tuesday, August 2, 2011

Retro Tech Cards & Deskpad Holder


I was immediately enamored by the Retro Tech stamp set when it was released this spring. After getting some inspiration from a fellow consultant, these cards are what I came up with. (I also took a little color inspiration from "I Love Lucy".)

Monday, October 13, 2008

Scrapbook in a Purse

I got this pattern from a bulletin board and just love how easy it is to make one of these! I've made two like the pink one and given them away as gifts, and then I made the "western" one and gave it to my friend Penny who has always been a cowgirl. I need to make one for me and actually put photos and journaling in it! (Sorry the bottom photo is blurry - I was in a hurry and only took one shot.)


Tuesday, July 29, 2008

Photo Tablets

I got the idea for these tablets from a magazine. I especially love the one of me and my sister. I was about 5. My cousin just happened to find this photo in her stash last year and it was fun to use it. I gave identical ones to my mom and my sister for Christmas. Guess I should make myself one, too!

Clipboards

A fellow consultant gave our group a cute clipboard for Christmas a couple years ago, so I made some for my family last year.

Sunday, July 27, 2008

M&M Jar

I made this for my husband for his birthday last year.