Showing posts with label Christmas. Show all posts

Sunday, January 4, 2015

Christmas Gifts

Happy New Year!

Now that Christmas has come and gone I can share a couple of the gifts I made for my family. I tried a new technique/product that I hadn't used before, but I was also able to use some things that I've had lying around for more than a year.

First up are these chalkboard mason jars. I received a lot of emails over several months with ideas for crafting with them. I didn't have time to try even a fraction of them, of course, but since I liked the chalkboard idea the most, it's the one I did.


Before I got started I used some blue painter's tape and wrapped it around the threaded part of the jars so that the lids would still screw on like they're supposed to. I covered my work area (outside) with a large piece of plastic, and then I found a box that I could stand on end and stand the jars in. Following the directions on the can of spray paint, I applied my first layer of chalkboard paint making sure to rotate each jar to cover the whole thing. Once the paint had dried for the appropriate amount of time, I added a second coat.

When everything was really dry I used a chalkboard marker to decorate the outside. I thought about cutting some tags or letters or something to hang from the twine but decided I liked the simple, rustic look of just using the twine.

Here is what I used:
  • mason jars, twine and Krylon Chalkboard Paint all purchased at Michael's
  • Chalk Marker from Close to My Heart


Next up are these chalkboard signs. I'd started working on them ages ago but couldn't get my idea to come together enough to get them done in the timeframe I was working with. A few months later this stamp of the month came along and I created a card with these houses and the sentiment. I knew then that I'd come up with the design for these signs.

Because I was using a design I'd already worked with, I still had the Cricut Craft Room file that I'd use to cut out the houses. All I had to do was choose my colors and cut! The embossing folders work so well that you can easily run 3 pieces of cardstock through at once, so I stacked the houses and did one run through with each of the folders I needed. I swiped two of the white houses across the Honey ink pad to add another color.


Cranberry, Olive, and White Daisy cardstock with brown stripe ribbon.


Slate, Whisper, and White Daisy cardstock with black stripe ribbon.


Cranberry, Olive and White Daisy cardstock with burlap ribbon.

Here is what I used:


Thanks for visiting!

Tuesday, September 30, 2014

Stamp of the Month Blog Hop - October: Home for the Holidays


Welcome to the Stamp of the Month Blog Hop! This month we’re featuring the October set Home for the Holidays, a set of 7 stamps. 

If you have come here from {Jen Rubio’s blog}, you’re in the right place! There are more than 70 independent Close to My Heart consultants participating. Click on the link at the end of the post on each blog to move through the Hop.

The Blog Hop is a great big circle. Start here and work your way around. If you get lost along the way you’ll find a complete list of participating consultants here. You can use this list to pick up where you left off.

Off we go!


I love it when I am able to use something from my stash for a project! 

My October swap assignment was “no limits,” which means I had to use a pre-determined paper packet with the Stamp of the Month to create anything I wished. I had tossed around a few ideas with picture frames, but when I went to my stash to find said picture frames, I didn’t have enough of the same color. However, I found these tins I’ve had for ages and knew right away they were perfect!

Once I had the tins my idea came together pretty quickly. I cut the background paper and rounded the corners. I used the Art Philosophy cartridge to cut out the ornaments – one from Champagne cardstock and a slightly smaller one from Background & Texture paper. I stamped the ornament in Ruby and then cut out the center. I stamped it again in New England Ivy and cut out the tree.


I used one layer of 3-D Foam Tape under the tree and a double layer of it under the ornament. I tied a piece of Baker’s Twine to the top and tucked the long piece behind the background paper before adhering the whole thing to the inside of the tin.


To finish it all off I put a Bitty Sparkle in the star on top of the tree and attached a piece of the zip strip off the B&T for the sentiment. Finally, I attached the bow and loop to the back of the tin with Liquid Glass.

Here is what I used. All products are Close to My Heart except for the tins:


Now “Hop” on over to {Nancy Womersley’s blog} to see her work, and be sure to visit each consultant’s site to get some great crafting inspiration and other fun ideas! Don’t forget, this exclusive stamp set is only available through October 31st! Click here to order yours today!


Wednesday, October 30, 2013

Artbooking Made Easy: Festive Mini Albums (S01E09)


With the Cricut® Artbooking cartridge from Close To My Heart, your photos will find a cozy home on the pages of a dazzling holiday mini album. Watch the video to gather your own ideas on how to use its themed keys to create merry and bright holiday projects that last.

Monday, October 14, 2013

Holiday Gift Guide Blog Hop 2013

In honor of Close to My Heart's new Holidays from the Heart Gift Guide, some members of the Stamp of the Month Blog Hop have decided to do a special hop featuring these new and exclusive products. If you have come here from Jody Gustafson's blog, you're in the right place. There are 22 Close to My Heart consultants participating in this Hop. If you get lost, click here to find your place again.


The 21-page Holidays from the Heart Gift Guide is a festive supplement to the Autumn/Winter 2013 Idea Book. Inside you’ll find all-new products, offered for a limited time only, including papers, project kits, embellishments, stamps, and more to pull off a memorable holiday season!

Any regular follower of the Stamp of the Month Blog Hop has probably noticed that I almost always make a card. I don't necessarily do this on purpose, but many times I don't have as much time to create as I'd like so I find that a card is a faster project than anything else. That being said, I made a conscious effort to create something different (different for me) for this Hop.

I generally prefer more traditional Christmas colors, but I am loving the varied shades of greens and reds in the Sparkle & Shine products. The Juniper, Ruby, and Slate have a sort of 50s feel to them, and I really like that. I also love the designs of the Sparkle & Shine Complements, so I decided to make a Christmas layout. I might as well have at least one done ahead of time, right? I hadn't used any of the layout patterns out of Make It From Your Heart Vol. 2 yet and that was another thing on my to-do list. Here's what I came up with:


I used the Sparkle & Shine paper pack (X7176B), the Sparkle & Shine Complements Dimensional Elements (X7176C), and the Ruby Mini-Medley Accents Collection (Z1861).

Now Hop on over to Judy Faye Garner's blog to see what she's created for you! Don't forget to go all the way through the Hop so you don't miss out on any of the artwork!

Friday, November 25, 2011

Black Friday Sale!


Have you been good this year and gotten your name on the Nice list?

If so, have Santa* email me an order anytime Friday, November 25th through midnight Sunday, November 27th for the

Cricut® Art Philosophy Collection

(or any order totaling $99 or more**)

Santa* will receive a 10% discount off his order
plus free gift wrapping and delivery from my house to under your tree!

This offer is only available through Vicki Price, Close to My Heart Independent Consultant. Valid Friday, November 25th through midnight Sunday, November 27th. All orders must be paid in full no later than November 28th. Cash, check, and credit cards accepted. Not valid with online orders. *Santa can be a significant other, friend, relative, or even yourself. **$99 total before shipping and taxes.

Email me at priceofpaper@gmail.com to order!


Friday, November 4, 2011

Holiday Wishes

I'm so excited to get this deal for myself! This is one of the prettiest Christmas trees I've ever seen. Here are the details:

When you place a minimum order of $25 in My Acrylix® Stamp Sets* between November 1–30, you can add a new D-size Holiday Wishes stamp set for only $5! That’s a significant savings of $12.95. You may buy one Holiday Wishes stamp set for every $25 in qualifying stamp sets you purchase. As a creative bonus, many of the images in the set coordinate with our Cricut® Art Philosophy cartridge for added cutting and stamping fun!


Friday, September 30, 2011

Holiday Magic - October Stamp of the Month Swap


Here is my card for the October Stamp of the Month swap. I didn't want to have to cut out all the stockings by hand, so I cut them out using the Close to My Heart Art Philosophy cartridge, but slightly smaller than what the stamp image size is. The image still covers all of the shape, but I didn't have to worry as much about it lining up.


These are the cards made by our entire swap group. The designers are from top left (with the paper packet they used in parentheses): LeAnne Dudley (Typeset), Jodi Frank (Dreamin'), Randa Wacaster (Elemental), Julie Nilsson (Roxie), Angie Petersen (Wonderland), Vicki Price (Believe), Bertha MacMillan (Sonoma), Cathlene Burk (Mischief), and Krista Staton (Roxie). (I have to note here that Bertha actually put ink on her lips and kissed the rim of that adorable coffee cup!)

Tuesday, August 2, 2011

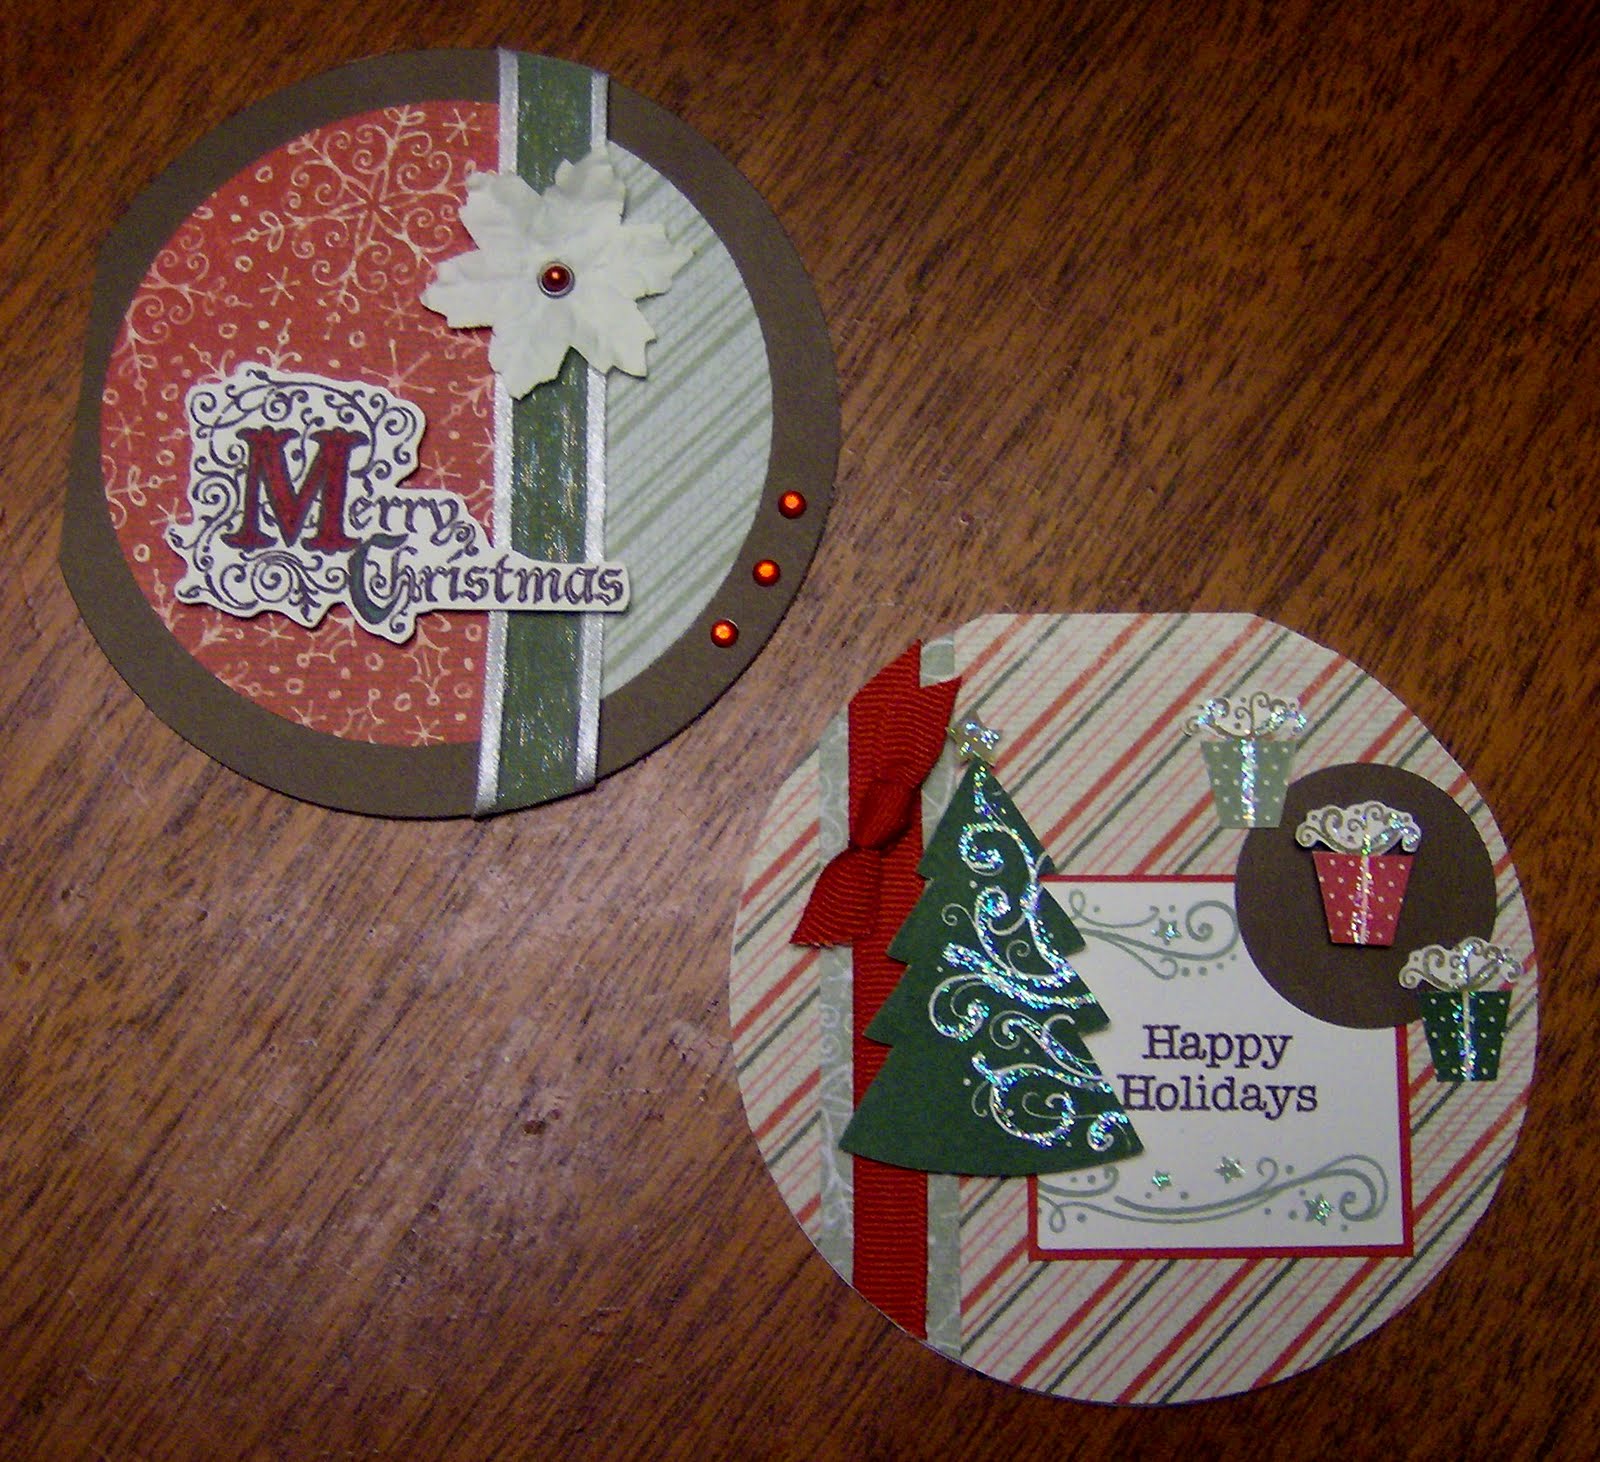
Christmas Card Workshop 2010


Since we now have circle cards, I thought it would be fun to use them to make Christmas cards this year. I also used the Mistletoe papers, the Mistletoe Level 2 accessories, and some Glitz Glitter Gel along with the A Timber and St. Nick stamp sets.

Wednesday, January 6, 2010

First Christmases


Here's another layout from a sketch challenge. This one was more difficult for me. The requirements were using paper you'd been hoarding for at least six months, use two photos from different events or times, and no cardstock except for the journaling. After I found the photos it came together pretty easily.

Thursday, August 7, 2008

Christmas Cards

I needed a project for my open house last fall. I had never used this gorgeous this stamp set and thought it would go beautifully with this new paper, so I designed these fast and simple cards.